How to Change Pricing on Events
This article summarizes the many ways to change pricing on an event. That includes changing the pricing plan and editing the pricing for one or more room or resource charges manually.
Overview
Mazévo uses a system-wide default for pricing on new events. When you create an event as an event planner, you can override the system's default pricing plan for the event. The system then uses this plan to determine the pricing for each room and resource on the event.
The system-wide default can also be overridden by setting the billing defaults for an organization, in which case, those values are used for new events. In either case, the billing information can be manually updated to reflect event-specific requirements.

To change the pricing plan for an existing event:
1. Open the event in the event editor and click Change.
2. Click the Billing tab, select the new pricing plan for the event, and click Save. (Note: This will not change any of the prices already set on the event. Only bookings and resources added after this change will have the new pricing.)
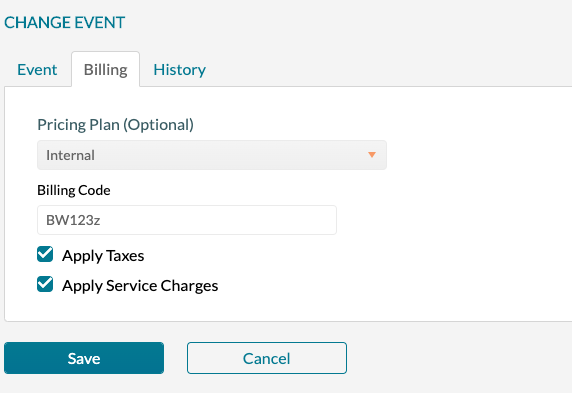
If you need to change the prices for room charges because you changed the event's pricing plan, the system can do that for you.
To reset pricing for room charges based on a new pricing plan:
1. Open the event in the event editor and select the bookings that you want to "re-price" by checking the box next to each booking.
2. Click Reset Price in the pop-up menu and click Yes to confirm the change.

If you want to reset the pricing for the resources on an event because you changed the event's pricing plan, the system can do that for you.
To reset pricing for resources to the new pricing plan:
1. Open the event in the event editor and click the Resources tab. Select the resources that you want to have updated pricing by checking the box next to each resource.
2. Click Reset Price in the pop-up menu and click Yes to confirm.

To override the pricing plan and change the price on one or more bookings manually:
1. Open the event in the event editor.
2. Select the booking(s) to be changed by checking the associated box(es).
3. Click Change Bookings > Change Price in the pop-up menu.
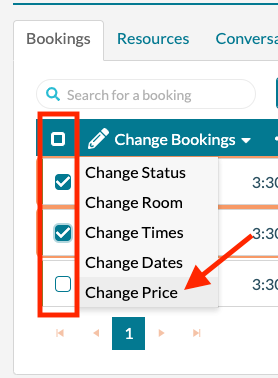
4. Enter the new pricing information (method, price, and discount) and click Save.
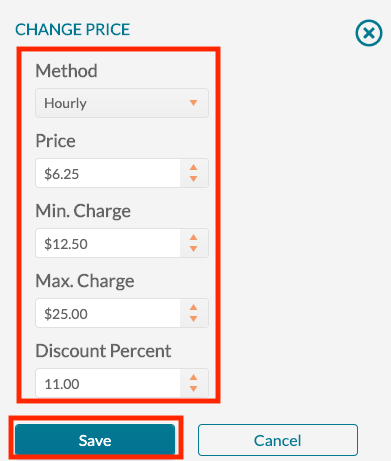
To override the pricing plan and change the price on one or more resources manually:
1. Open the event in the event editor.
2. Click the Resources tab and select the resource(s) to be changed by checking the associated box(es).
3. Click Change Resources > Change Price in the pop-up menu.
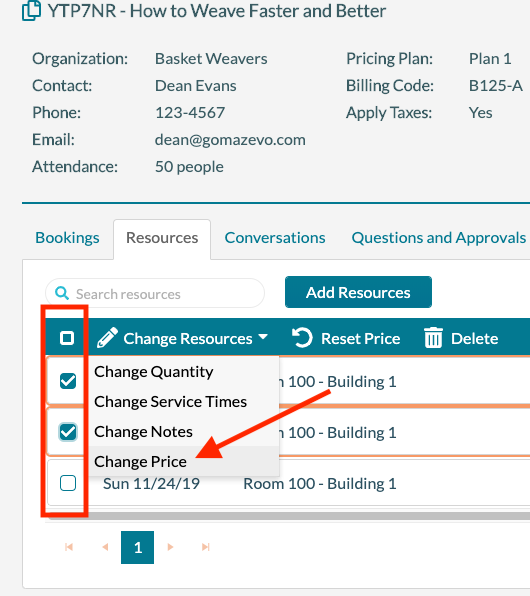
4. Enter the new pricing information (method, price, minimum charge, maximum charge, and discount) and click Save.

If you need to show a credit (i.e., a negative amount) on a confirmation or invoice, you simply change the quantity of the resource to a negative value. For example, you might want to credit the amount charged to the customer if they're unhappy with a rented data projector.
To create a resource "credit" entry:
1. Open the event in the event editor, click the Resources tab, and find the resource in question.
2. Check the box next to the item and click Change Resources > Change Quantity in the pop-up menu.
3. Type -1 and click Save.
The price of the item is updated, as are associated taxes and services charges. With regard to resource inventory, negative quantities are ignored when calculating resource usage.
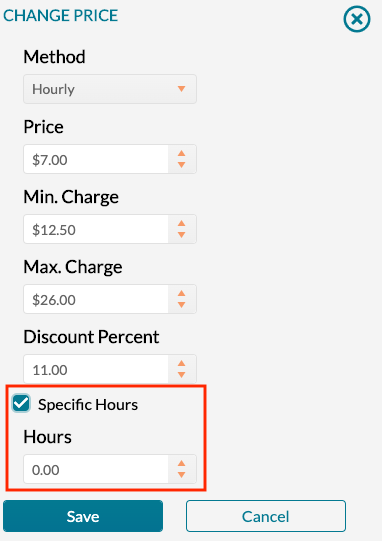
To manually override the hours for hourly charges:
For rooms and resources that use hourly pricing methods, you can override the system's calculation of hours based on the event time, by checking the Specific Hours checkbox and entering the number of hours to use for the hourly pricing calculation.
For more information on pricing methods, click here.
